Fiber Stripping
Fiber Scribing & Breaking
Fiber to Ferrule Bonding
Fiber Connector
Fiber Hand Polishing
Fiber inspection microscope
LT-0600 Fiber Optics Workshop Basic
Topics:
 LT-0600 Fiber Optics Workshop Basic
In this workshop the hand grinding and polishing of optical fiber is introduced and trained. This method is useful in research labs or other places with occasional requirements.
 |
Stripping off the plastic cladding of the fiber with miller pliers. |
 |
The stripped fiber is inserted into the ferrule of the connector which is filled with an epoxy adhesive. |
 |
After hardening of the adhesive, the protruding fiber is scribed with the scriber with a hard tungsten blade and broken apart. |
 |
The first polishing step is performed as "air polish". This removes irregular broken parts avoiding chipping by the latter polishing. |
 |
Subsequently to the air polishing the final poslihing takes place. |
 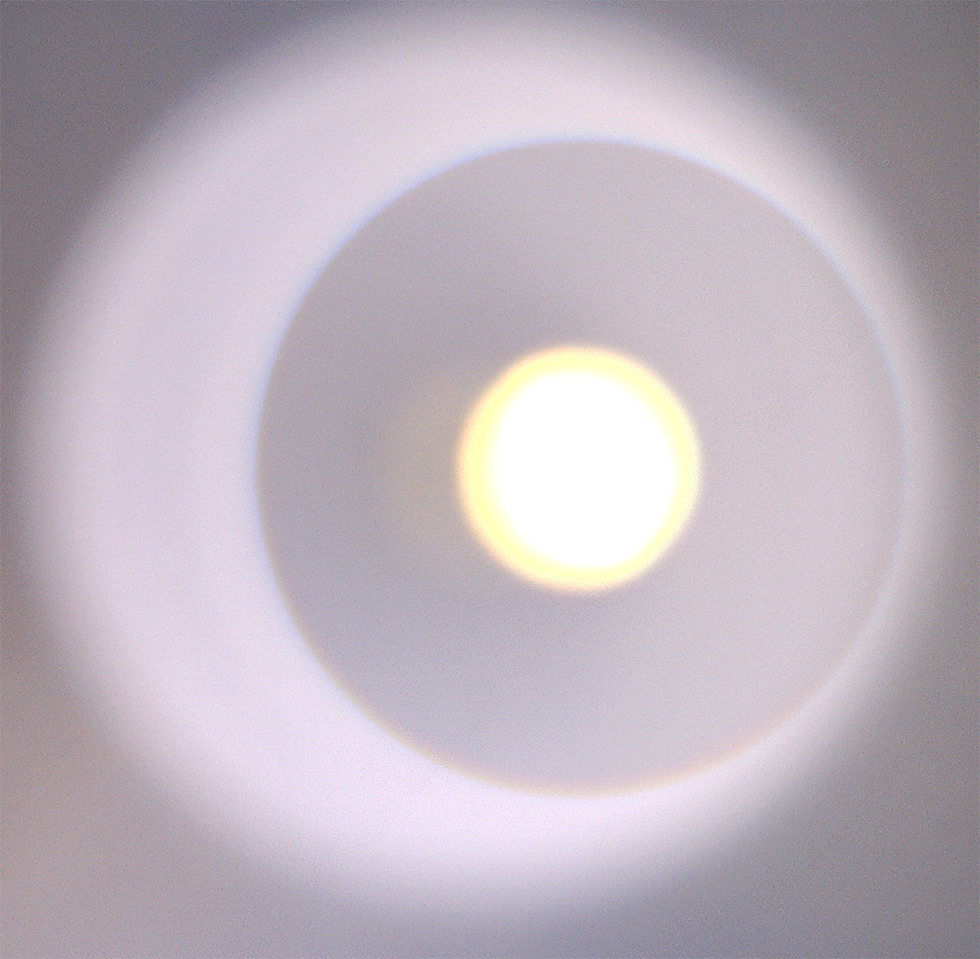 |
From time to time the polished surface of the fiber connector is checked with the handheld microscope. If you see an image as shown on the left, the fibre is perfect. |
| Item | Code | Qty. | Description |
|---|---|---|---|
| 1 | CA-0600 | 1 | Fibre inspection microscope |
| 2 | CA-0625 | 1 | Fibre scriber, tungsten carbide |
| 3 | CA-0630 | 1 | Adjustable plastic cover stripper |
| 4 | CA-0640 | 1 | One step polishing film 2 µm, set of 50 |
| 5 | CA-0672 | 1 | ST - connector multimode, Set of 60 |
| 6 | CA-0710 | 1 | Two-part anaerobic epoxy for 150 connectors |
| 7 | CA-0726 | 1 | Acrylic plate 230 x 140 x 3 mm |
| 8 | CA-0728 | 1 | Fibre Optic Polishing Disc for ST, SC, FC |
| 9 | CA-0730 | 1 | Cleaning wipes dry - 280 wipes per box |
| 10 | CA-0732 | 1 | Dispenser bottle. Isopropyl alcohol |
| 11 | CA-0740 | 10 | Epoxy Syringe |
| 12 | CA-0742 | 1 | Fibre splint tweezers |
| 13 | CA-0744 | 1 | Fibre optic scrap trash can |
| 14 | OC-2410 | 1 | Multimode fibre 1000 m 50/125 µm |
| 15 | UM-LT07 | 1 | Manual Fibre optics Workshop |
| Media Type | Title | File Size [MBytes] | Action |
|---|---|---|---|
| LT-0600 Fibre Optics Workshop Basic Version: 2014 |
7.70 MB | Download | |
| Catalogue Page | |||
| JPEG, PNG, SVG | Pictures | ||
| MP4 | Video |